How to Clean Cat Tree: A Complete Beginner’s Guide
Hey there, fellow cat parent. If you’ve ever caught your kitty perched proudly on their favorite scratching post only to notice the whole thing looking a little worse for wear, you’re not alone. I’ve been reviewing cat furniture for my blog for years, and let me tell you—nothing beats the joy of watching your cat zoom up and down their tree. But that daily use adds up fast. Fur, dander, litter bits, and the occasional mystery stain turn even the sturdiest cat tree into a mess quicker than you’d expect. That’s exactly why learning how to clean cat tree setups is one of the smartest things you can do for your home and your pet.
In this guide, I’m walking you through everything from start to finish. We’ll cover what a cat tree actually is (in case you’re brand new to this), the supplies you need, exactly how to tackle each part without wrecking it, and the sneaky mistakes that send most beginners back to square one. I’ll share the practical tips I’ve picked up after testing dozens of these towers in real homes with real cats. No fluff—just straightforward steps that actually work. By the end, you’ll know how to keep your cat tree looking (and smelling) fresh for months on end, whether it’s a simple two-level perch or a multi-story condo.
Related: Spring Awakening: Your Complete Guide to Choosing a Dur
Let’s dive in so your cat can keep enjoying their personal jungle gym without you stressing over the cleanup.
What Exactly Is a Cat Tree, Anyway?
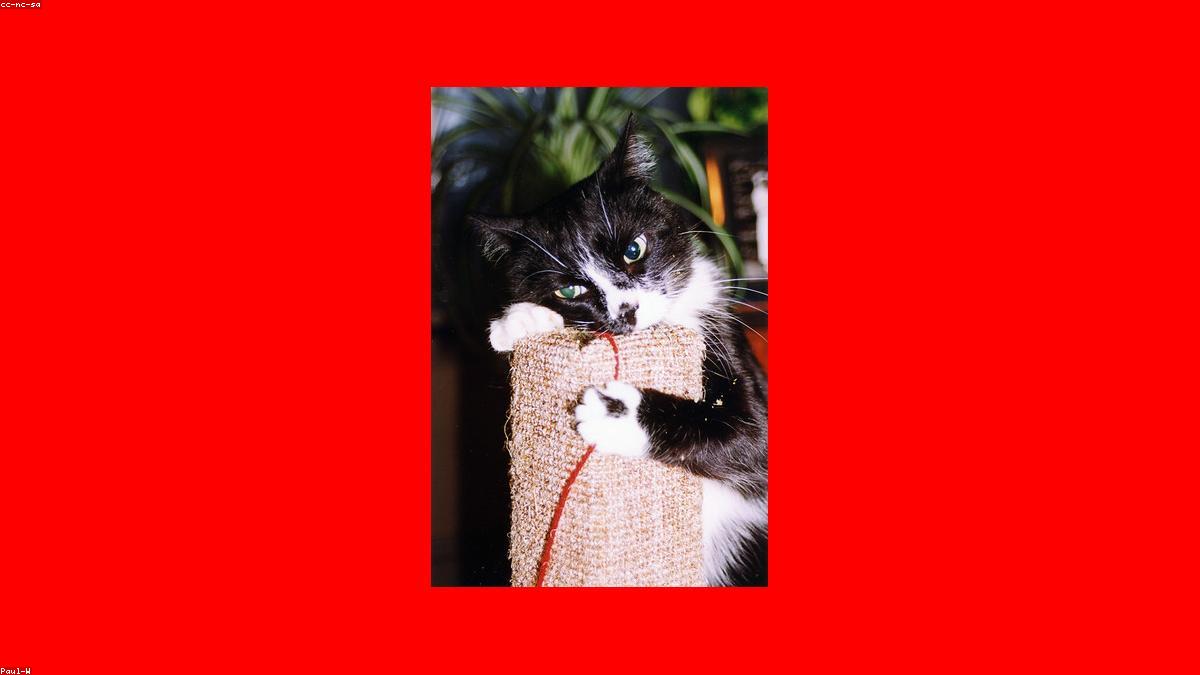
Before we grab any cleaning supplies, it helps to understand what we’re working with. A cat tree—sometimes called a cat tower, activity center, or scratching gym—is basically a vertical playground designed for indoor cats. It usually has a sturdy base, one or more wrapped posts for scratching, flat platforms for lounging, and sometimes enclosed “condos,” hammocks, or dangling toys.
The materials vary wildly, and that matters a lot when you’re figuring out how to clean cat tree surfaces. Most have:
Related: Where to Put Cat Shelf: Practical Checklist for Cat Own
- Sisal rope or twine wrapped around posts (that rough, natural-fiber texture cats love to claw).
- Carpet or plush fabric on platforms and bases (soft and cozy but a magnet for hair).
- Wood, particleboard, or cardboard for the frame and shelves.
- Faux fur, microfiber, or woven mats on perches.
Beginners often assume every part cleans the same way. Nope. Treating sisal like carpet or soaking wood like fabric is a fast track to replacement. That’s why we’ll break it down by material later. For now, just know your cat tree is more than furniture—it’s your cat’s territory, nap spot, and exercise equipment all in one. Keeping it clean keeps them happy and your living room from smelling like a litter box.
Why Bother Learning How to Clean Cat Tree Setups?
Cats are clean creatures by nature, but their trees collect grime fast. Daily scratching flakes off sisal fibers. Shedding season turns carpeted platforms into fur blankets. And any cat who uses the tree right after the litter box tracks tiny particles everywhere. Left uncleaned, these build up into odors, allergens, and even skin irritations for sensitive kitties.
From my experience, a neglected cat tree becomes a health issue. Dust and dander trigger sneezing fits (for both you and your cat). Old stains can harbor bacteria. Plus, cats are picky—if their tree starts smelling off or feeling sticky, they’ll ignore it and scratch your couch instead. Regular cleaning extends the life of your investment and keeps your cat using it daily. I’ve seen trees last three times longer with simple weekly maintenance versus “set it and forget it” owners.
Related: Small Cat Tree FAQ: Expert Answers from a Retired Vet T
Supplies You’ll Need for Cleaning a Cat Tree
You don’t need fancy gadgets or a big budget. Most of what works best is already in your house or costs just a few dollars at any store. Here’s my go-to list after years of hands-on testing:
- Soft-bristled brush or cat grooming glove (for loosening fur without damaging fibers).
- Handheld vacuum with crevice and upholstery attachments (pet-hair-specific ones save time).
- Microfiber cloths (plenty of them—cheap packs work fine).
- Mild, pet-safe dish soap or enzyme-based pet cleaner (breaks down organic messes like urine or vomit).
- White vinegar diluted in water (natural deodorizer—never harsh chemicals).
- Baking soda (for sprinkling on odors before vacuuming).
- Spray bottle for mixing solutions.
- Old towels or absorbent rags for drying.
- Optional but helpful: a small scrub brush with soft bristles and rubber gloves to keep your hands clean.
Stick to fragrance-free, non-toxic options. Cats have sensitive noses and can have bad reactions to strong scents or residues. I always test any new cleaner on a hidden spot first—better safe than a trip to the vet.
Step-by-Step: How to Clean Cat Tree the Right Way
Here’s the exact process I use every time. It works for most standard cat trees and takes about 30–60 minutes depending on size. Work in a well-ventilated area and give everything plenty of time to air-dry before your cat jumps back on.
Step 1: Prepare and Disassemble (If Possible)
Unplug any electronic parts (like lights or heated beds) and remove detachable toys, cushions, or hammocks. Many modern trees have screws or clips—check the base or manufacturer instructions. If yours is one solid piece, just work section by section from top to bottom so debris falls onto lower levels for easy pickup. Lay down an old sheet underneath to catch fallout.
Step 2: Remove Loose Debris and Fur
Start dry. Use your vacuum on every surface. Go slow over carpeted areas to suck up embedded hair. For sisal posts, run the brush attachment lightly in the direction of the wrap to lift matted fibers. I like to follow with the grooming glove—it grabs stubborn clumps without pulling the rope loose. This step alone makes a huge difference and prevents you from spreading dirt around later.
Step 3: Spot-Clean Platforms and Carpeted Surfaces
Mix a few drops of pet-safe soap in warm water. Dampen (don’t soak) a microfiber cloth and gently blot any visible stains. For ground-in dirt, use the soft brush in small circles. If you’re dealing with litter residue or organic smells, switch to an enzyme cleaner—they eat the proteins that cause odors instead of just masking them. Never scrub hard; carpet fibers mat easily.
Step 4: Tackle Sisal-Wrapped Posts
Sisal is tough but hates water. Vacuum first, then use a dry brush to flick away loose bits. For sticky spots (think tracked-in litter), dab with a barely damp cloth and a tiny bit of vinegar solution. Let it air-dry completely—usually 4–6 hours. I’ve ruined posts in the past by getting them too wet; the rope frays and loses its scratch appeal fast.
Step 5: Clean Wooden or Cardboard Elements
Wipe down exposed wood with a cloth dampened in plain water or diluted vinegar. Avoid saturating joints where glue could loosen. Cardboard scratching pads or inserts are trickier—spot-clean only and replace when shredded. Most trees have replaceable pads, which is why checking for modular designs pays off.
Step 6: Freshen Up Enclosed Condos and Hammocks
These are bacteria hotspots. Remove the fabric parts if possible and wash by hand in the sink with mild soap. For non-removable sections, use the vacuum followed by a lightly damp cloth. Prop doors open while drying to prevent mildew inside dark spaces.
Step 7: Deodorize the Whole Thing
Sprinkle baking soda lightly on platforms and posts, let it sit 15 minutes, then vacuum thoroughly. Follow with a light mist of diluted vinegar (1:1 with water) on a cloth—wipe, don’t spray directly. This combo neutralizes odors without leaving residue your cat will hate.
Step 8: Dry Everything Completely
This is the step most beginners skip, and it causes mold or warping. Use fans, open windows, or place the tree in a sunny spot (away from direct heat that could fade colors). Wait until it feels bone-dry to the touch—usually overnight for bigger trees.
Reassemble, add fresh toys if you have them, and watch your cat rediscover their tree like it’s brand new.
How to Clean Different Cat Tree Materials
Not all surfaces respond the same. Here’s what I’ve learned from testing everything from budget models to premium ones.
Carpeted platforms: Vacuum, then blot with soap solution. Avoid soaking—excess water seeps into the padding underneath and never fully dries. Sisal posts: Dry methods only. A quick brush and occasional vacuum keeps them functional. Once the sisal wears thin, it’s time for a new post sleeve rather than heavy cleaning. Plush or faux-fur perches: These trap hair like crazy. Use a rubber grooming tool first, then a damp cloth. Enzyme cleaners shine here for any accidents. Wood bases and frames: Dust regularly. Wipe with a dry or barely damp cloth. Wood polish is unnecessary and often leaves slippery residue. Cardboard scratchers: Spot-clean lightly or replace. They’re disposable by design and cheap to swap out.Common Mistakes to Avoid When Cleaning Cat Trees
I’ve made most of these myself early on, so learn from my oops moments.
- Using bleach or harsh household cleaners—residues irritate cat paws and lungs.
- Soaking the entire tree in the bathtub—water gets trapped in seams and leads to mold or sagging.
- Scrubbing sisal aggressively—fraying makes it useless for scratching.
- Rushing the drying step—damp surfaces breed bacteria and stink within days.
- Forgetting to clean the base—litter tracks settle there first and spread upward.
- Cleaning too aggressively on new trees—light maintenance prevents big jobs later.
How Often Should You Clean Your Cat Tree?
Weekly quick vacuums take five minutes and prevent buildup. Deep clean the whole thing every 4–6 weeks, or more often in multi-cat homes or during heavy shedding seasons. I mark it on my calendar right after litter box day so it becomes routine.
Budget-Friendly Ways to Keep Cleaning Simple
You don’t need to spend much. A $5 bottle of enzyme cleaner lasts months. Baking soda and vinegar are pennies per use. Reuse old towels instead of paper towels. If your tree has replaceable parts like scratch pads or cushions, swap those instead of deep-cleaning worn pieces—saves time and money long-term.
Choosing a Cat Tree That’s Easier to Maintain
While you’re mastering how to clean cat tree routines, think ahead about your next one. Look for trees with removable, washable platforms and modular posts you can replace individually. Tighter-woven sisal holds up better than loose wraps. Avoid super-plush fabrics if your cat sheds heavily—they look great new but become fur magnets fast. Solid bases with low carpet coverage mean less tracking overall.
If you’re shopping around for a replacement or an upgrade that stands up to regular cleaning, For anyone shopping around, GlideSales carries most of what I mention here at fair prices.
Key Takeaways
- Start every cleaning with a thorough dry vacuum and brush to remove loose fur and debris.
- Use only pet-safe, mild cleaners and always test first.
- Dry completely—rushing this step causes more problems than dirt ever does.
- Clean weekly for maintenance and deep-clean monthly for best results.
- Match your method to the material: sisal stays mostly dry, carpet gets blotted, wood gets dusted.
- Avoid harsh chemicals, soaking, and aggressive scrubbing to protect your investment.
- A clean cat tree keeps your cat happy, your home smelling fresh, and your furniture safe from redirected scratching.
Bottom Line
There you have it—your no-nonsense roadmap for how to clean cat tree setups that actually works. I’ve cleaned everything from tiny apartment perches to giant floor-to-ceiling towers, and the same simple system keeps them all in great shape. Your cat will notice the difference immediately, and you’ll love not dodging fur clouds every time they leap down.
Give it a try this weekend. Grab your vacuum, mix up that vinegar solution, and spend an hour giving their tree some love. You’ll be amazed how fresh it feels—and how quickly your cat claims it again. If you have a stubborn stain or weird material I didn’t cover here, drop a comment on my blog and I’ll help troubleshoot. Happy cleaning, and here’s to more zoomies and fewer sneezes in your house!
(Word count: 2489)